Have a question? Enter a search term. Or give us a call at 1-888-518-0818

Dispatch Board is one of the main “Centers” which you can see at the top of your screen. Since these “Centers” are controlled by permissions, you may not be able to see this particular “Center” from all profiles. If you are missing one of these options, please contact your office administrator.
This article focuses specifically on the features of the Dispatch Board. Once you understand the features you can learn how to schedule jobs using The Dispatch Board.

The Dispatch Board not only allows you to easily schedule jobs, but it also provides you with a visual representation of all of your scheduled jobs. The default view is a grid with all of your employees stacked vertically and the time of the day flowing horizontally. The dotted line indicates the current time of day.


By right-clicking on the current time display above the dotted line, you will have some other options. "Filter Tasks" allows you to view specific job types on The Dispatch Board such as "Service Call" or "Installation".
You can zoom in or out. You can display specific date ranges. Also, you can show or hide the dotted line.
We will cover each function located near the top of The Dispatch Board individually.

You can choose between a horizontal or vertical view.

You can click on "Today" or use the back or forward buttons to navigate to prior or future dates.

You can click on the calendar to select a specific day.

The one, five, and seven-day view buttons allow you to see multiple dates at a time, such as today, the work week, or the entire week.

The filter field enables you to filter employees by name, department, location, crew, or skills.

You can highlight jobs by description. For example, if we type “emergency” those jobs will be highlighted.

In this example, the jobs in The Dispatch Board are currently "colored by status", such as scheduled, working, completed, etc. In the Color Legend window on the right, you can see what each color represents. You can choose to "color by zip code" for example.

The Show Map button opens a map window that shows the current location of your field users.

The Show Map button opens a map window that shows the current location of The Show Quick Entry button opens a list of your Quick Entry templates. Quick Entries are a convenient way to schedule appointments that you frequently create. Simply drag and drop a Quick Entry to the desired time and employee. Learn more about Quick Entries.

The Show Color Legend button opens the Color Legend window that we previously covered.

The Show Waiting List button opens the Waiting List at the bottom of the screen. This consists of jobs that have been created, but havent been scheduled yet. You can expand the list by clicking and dragging. You can filter these jobs in the blank fields. When you are ready to schedule a job in the Waiting List, simply drag and drop them on to The Dispatch Board.

Also, you can move a job from the Dispatch Board into the waiting list by right-clicking on it, then going to “status” and selecting “Waiting List”.

The Un-Assigned List button opens the Un-Assigned list at the bottom of the screen. It works just like the Waiting List, however it consists of jobs that have been created, but haven't been scheduled yet. You can expand the list by clicking and dragging. You can filter these jobs in the blank fields. When you are ready to schedule a job in the Un-Assigned List, simply drag and drop them on to The Dispatch Board.

The Show Time Card Punches button displays employee time card punches directly on the Dispatch Board.

The Refresh button refreshes The Dispatch Board.

The Settings button opens up the Settings Window on the right. Here, you can establish your default settings for The Dispatch Board. We will cover each setting below.


Orientation allows you to set your default view to Horizontal or Vertical.
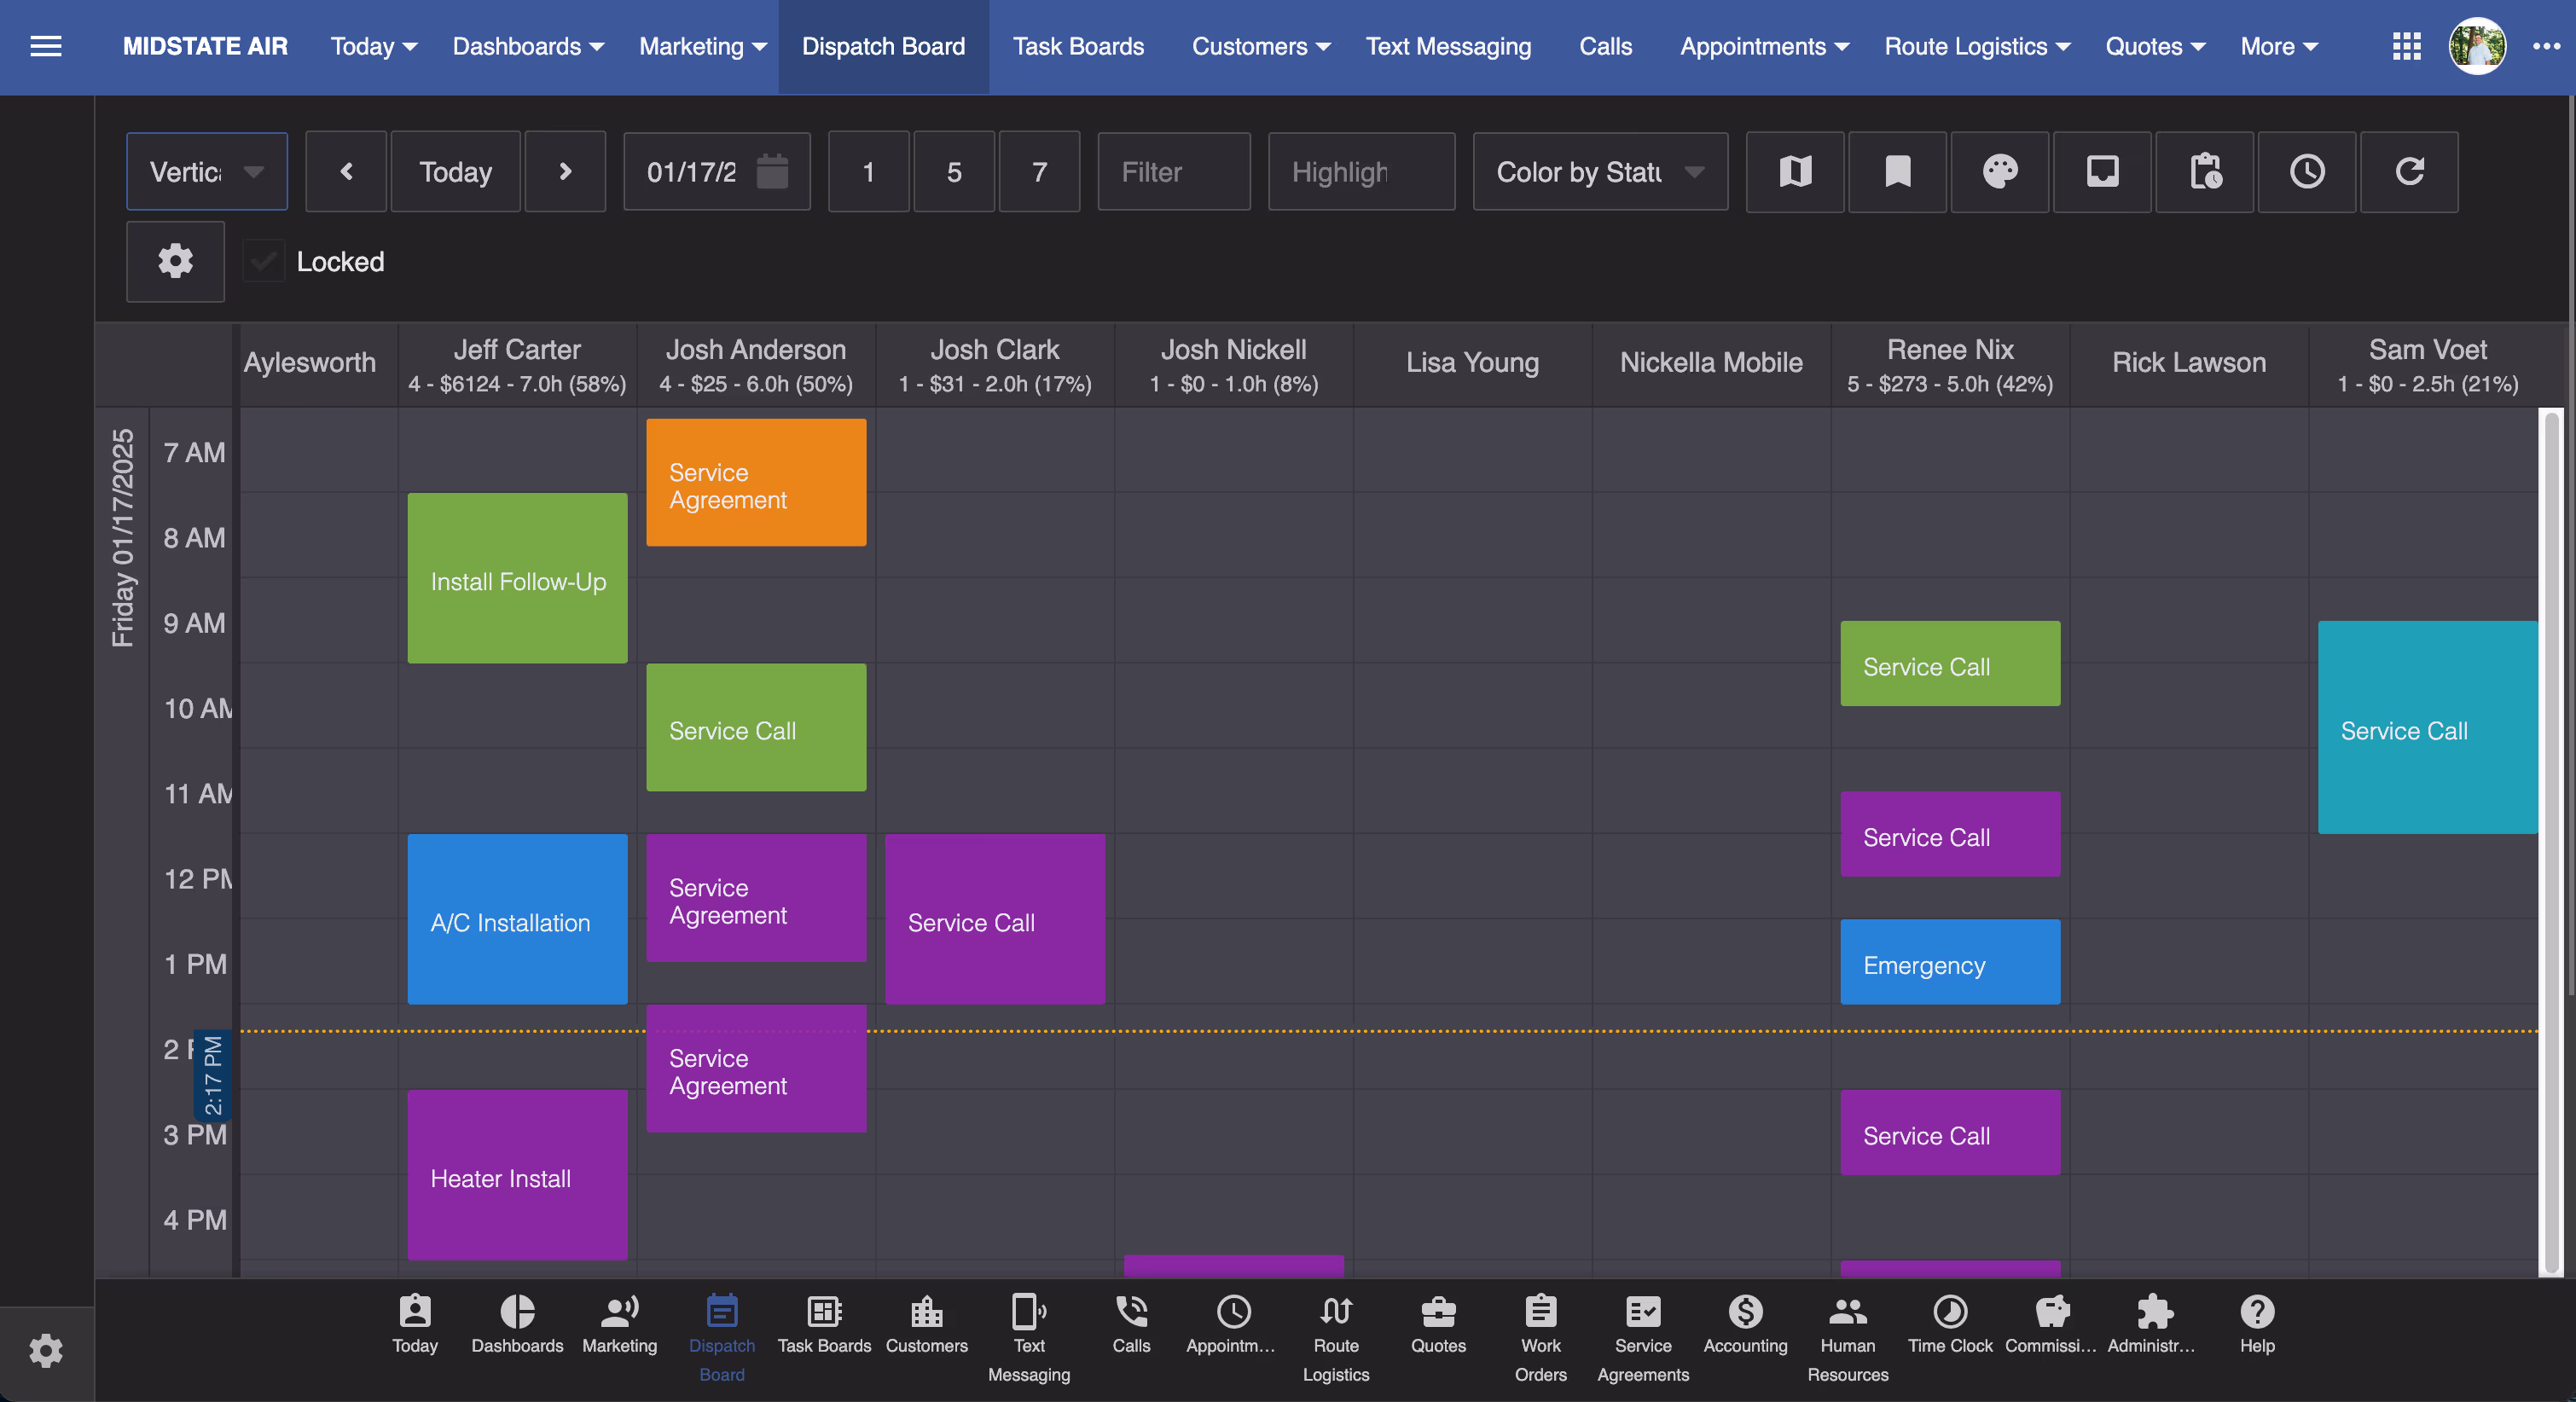
Event Label is the information provided on each job in The Dispatch Board. In this example, we have chosen "Description". Therefore, each job is labeled only by description such as "Heater Install", or "A/C Quote". If you choose "Customer Full Name + Description" that information would be displayed on each job.


Scheduler Grouping will change how your employees are displayed. If you choose group by department, you will see your employees grouped by department. If you choose N/A, for example, your employees will be listed alphabetically.

The Time Increment option allows you to change time increments on the Dispatch Board. You can see the difference between selecting 1 hour or 30 minutes.


With Refesh Interval, you can have the Dispatch Board automatically refresh at an interval of your choosing. Refreshing is important because you will want to see the latest information displayed, such as jobs being completed by your field techs.
The Start and End Hour settings should reflect your hours of operation. For example, if your business operates 24 hours a day, you can set this accordingly and you will see these hours displayed on The Dispatch Board.


The Color Filter option let's you set the default for your "Color By" filtering as previously mentioned.
The rest of the options allow you to choose whether or not you want these items that we previously covered to be displayed by default.
For example, you might choose to have your Quick Entry list permanently displayed. Be sure to hit save when you have your settings to your liking.


Back to the employee section on the left of your screen, you can filter by employee, department, crew, or disposition.
In this example, we have chosen to group our employee list by department. You can collapse or open any departments by clicking here.

The numbers next to each employee represent the number of jobs for the day, the value of the jobs for the day, as well as the amount of scheduled working hours for that employee. If an employee is a part of a crew, it will be displayed. here. You can also see each employee's current disposition.

By right-clicking on an employee, you will have some options. We will cover each one individually.
For example, if this employee calls in sick, you can assign his jobs for the day to another employee or crew. Or maybe you need to assign his jobs to another route.

You can send that employee a text message if you have that employee's number on file.

You can view the employee's route for the day in Google Maps.


You can view the employee's jobs for the day in the Map View.
You can open up an employee's profile to review or edit.


You can clear an employee's disposition.
By clicking on “Optimize Route", Smart Service Cloud will consider locations and drive times and will optimize the employee's schedule for the day accordingly.

Jobs can be scheduled simply by clicking on The Dispatch Board and dragging within a specific employee's schedule. Assuming this job will take an hour and a half, we will drag it accordingly. Then we will enter the job details.

When you see two jobs combined, as seen here, that means this job has been assigned to a crew. Learn more about crews here.

By hovering over a job, you will be provided with more details.

You can review and edit jobs on the Dispatch Board by double-clicking on it. The same goes for jobs in the Waiting List and the Unassigned List.

By right-clicking on a job, you will have more options. We will cover each one individually.

By clicking on “Dispatch Now” the field tech assigned to this job will be alerted, via text, to proceed to the job site immediately and will be provided details.


You can open the customer record for more details about the customer.
You can review and edit job details here.


You can view the job location in Google Maps.
You can see if a pre-notification is required for this job, and if it has been confirmed.


You can move the job to another day or time.
You can change the job status here. Keep in mind that your field techs will also be changing the status as they go about their work day.


You can delete this job, and all future recurrences.
You can always move the a job to a different time, or different employee by dragging it.
If you’re ready to continue with scheduling services with Smart Service Cloud, you can get started here.