Have a question? Enter a search term. Or give us a call at 1-888-518-0818


Smart Service Cloud now integrates with ChatGPT to provide you with a powerful AI Assistant.
The AI Assistant helps you write clearly and professionally. Whether you're emailing a customer or documenting work, it can improve grammar, tone, and clarity. Furthermore, you can create a specific "voice" to communicate your message.


Also, ChatGPT integration allows you to upload and store PDF instruction manuals in your Knowledge Center—such as one for an A/C Unit, for example.
Instead of searching through the entire document, you can simply ask the Knowledge Center a specific question about the item, and it will immediately find the answer for you.

In this example, we asked the Knowledge Center AI Assistant what tools are needed to test the compressor of this specific A/C Unit.
We were provided with specific answers and any other relevant information.
You can copy and paste this information into Work Order notes, for example, for your field techs to review.
To use the AI Assistant in Smart Service Cloud, you'll need a ChatGPT Plus subscription ($20 a month). You will be provided an API Key which you will enter into Smart Service Cloud.
If you're an administrator setting up the AI Assistant for your team, it's worth noting that the required subscription to ChatGPT Plus can benefit more than just your use of Smart Service Cloud. Once subscribed, you can use ChatGPT across your business and even in your personal workflows—helping you draft emails, brainstorm ideas, improve documents, and streamline communication across the board.

Open your web browser and go to https://chat.openai.com/
This is OpenAI’s official site where you’ll create your account and manage your subscription.
Click Sign Up if you are creating an account. Click Log In if you already have one.

On the bottom-left of your screen, select "Upgrade Plan".

Select the "Plus" plan. Follow the prompts to enter your payment information. This will give you access to GPT-4, the version used by Smart Service Cloud’s AI Assistant.
After subscribing, you'll need to create a secure API key that links your OpenAI account to Smart Service Cloud. Go to https://platform.openai.com/account/api-keys
Sign in with the same OpenAI credentials. Click + Create new secret key.


Give your key a name like “SSC Integration.”

Copy the API key that appears. You will only see it once. Store this key in a secure location. You'll need to paste it into Smart Service Cloud in the next step.
Go to the Administration Center and scroll to System Settings. Click on "edit" at the bottom of the window, and scroll down to "Integrations". Enter your ChatGPT API Key. Hit save. You're now connected and ready to use the AI Assistant and the Knowledge Center throughout the platform.

The AI Assistant is built into several key areas of Smart Service Cloud to help you communicate more clearly. In this section, we’ll highlight where you can use the AI Assistant throughout Smart Service Cloud.
You can create Email templates for all your customer-facing communications, from Work Orders to Invoices and everything in between. To access these templates, go to the Administration Center and scroll down to "Email Text Templates".
In this example, we will open up a template that I already created for Quotes.


In this example, I created a template that can be used when sending a Quote to a customer.
You will see {CustomerFullName} in brackets. These are called Merge Fields which allow you to automatically populate the customer's name into the email. This is optional. Read the article on Merge Fields to learn more.
Let's polish up this message using the AI Assistant. Click on the icon at the bottom of the window.
In the AI Writing Assistant window, you will be presented with many options. We will cover each.


For now, we will go with the "Simple" option. We will cover "Prompts" shortly.

You can write casually, neutrally, or formally.
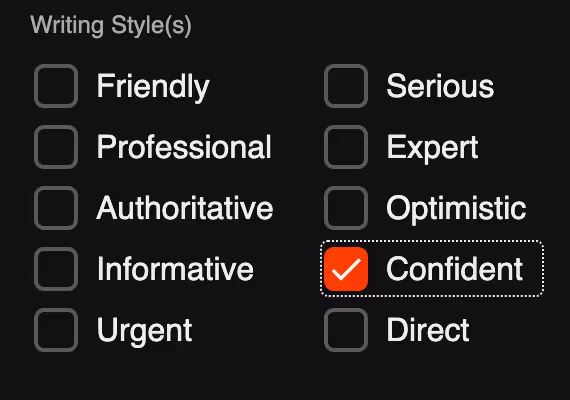
Here, you will have further options. Let's go with "Confident".

You will see some buttons along with the original message.

By clicking on "Improve" you will see changes made based upon the options that you selected earlier.

By clicking on "Simplify" you will be presented with a more concise version.

By clicking on "Shorten" or "Lengthen", you can make the message shorter or longer.
In this example, I selected "Lengthen". You can always edit the message to your liking.
Also, you can always select" Original" to start over.

At the bottom of the window, you will have other options. You can confirm your changes. You can select regenerate to get another option. There is a spell-check option if you decided to make any manual edits. Also, you can reset everything or cancel any changes.
As previously mentioned, there is an option for "Prompts". This option allows you to create a specific "voice" that can be used for your messaging. For example, the CEO of Smart Service Cloud likes to use the voice of a famous rapper.


Since we are working with a quote email template, we will create the voice of a Motivational Speaker.
Go to the Administration Center and scroll down to "Writing Assistant Prompts". Click on the plus symbol to create a new prompt.

The Short Description is for internal use only. The Prompt is the action that you want the AI Assistant to take. Provide the AI Assistant with more context. Be sure to hit save.

This new prompt can be found under Administration>Writing Assistant Prompts. You can always edit it and add as many different prompts as you need.

When you click on the AI Assistant button, you can select "Prompts" to use your Motivational Speaker. Then, click on Regenerate to reword the message in the voice of the Motivational Speaker.


You’ll see the AI Assistant button throughout Smart Service Cloud in areas where you enter or review written information—such as notes on work orders, invoices, and other key records.
The Knowledge Center allows you to upload and store PDF instruction manuals, making it easy to access important information so you don’t have to search through entire documents. Just ask a question, and the Knowledge Center will provide a direct, accurate answer. Whether you're referencing equipment manuals or internal documentation, this feature helps your team save time and work more efficiently.
You can grant access to the Knowledge Center to anyone in your organization by going to the Human Resources Center and selecting Employees. Open the profile of the employee(s) you'd like to grant access to. Then click Edit at the bottom of the screen, and click on the Security and Roles tab.


Check the box labeled Knowledge Center.
Once saved, that employee will see The Knowledge Center at the top and bottom of their screen.

Now it’s time to upload your PDF files to Smart Service Cloud. In this example, we’ll upload a PDF instruction manual for a specific A/C unit.
Go to the Administration Center at the top of your screen and scroll down to Collateral. Then, click the plus symbol in the bottom-right corner to add a new file.


Give the manual a name, a category, and a description. Drag the file into the collateral section. Click on the Knowledge Center toggle switch. Be sure to hit save.
Go to the Knowledge Center at the top or bottom of your screen. Click on the plus symbol to create a new Knowledge Center AI Assistant.

Give the new AI Assistant a name. Select a ChatGPT model if you have more than one. The text in the Instructions section will appear by default, but you can make edits. Then select the collateral for the A/C Unit Instruction Manual. Then hit save. Your new Knowledge Center AI Assistant will appear.


Click on your new Knowledge Center AI Assistant to interact with it.

Enter a question, then select "Run".
You will be provided with specific answers and any other relevant information.
You can copy and paste this information into Work Order notes, for example, for your field techs to review.