Have a question? Enter a search term. Or give us a call at 1-888-518-0818

With Task Boards, you can create workflows that match your business processes from start to finish, tracking every task through its lifecycle with step-by-step progress checks.

This feature requires a user to have the "Task Boards" role enabled on their employee profile. Go to the Human Resources Center and select "Employees". Open up a user profile. Click on edit at the bottom of the screen. Then click on the Security & Roles Tab. Check the box for Task Boards.

By giving an employee the Task Board role, they will have access to the Task Boards Center. However, you can choose who can view or edit your individual Task Boards. More on that later.

By default, all Smart Service Cloud customers will have some Task Boards already in their database. For example, you will have Task Boards for your Work Orders and Quotes. They just need to be initialized.
Smart Service Cloud can create a custom Task Board for your unique workflow. Contact us to learn more.

Go to the Task Boards Center at the top of your screen. By default, everybody will have a personal Task Board.
Let's initialize your Task Board for all of your Work Orders. At the top of your screen, click on "New". Then select "Board". Then select Enterprise Production Pipeline (includes ALL Work Orders). Then hit save.

You have just initialized your Task Board for ALL Work Orders. If you already have Work Orders in your database, they will all show up here. Each list within this Task Board represents the status of your Work Orders in order from "Un-scheduled" to "Void". When a status of a Work Order is changed from "Scheduled" to "In-Route" for example, the changes will automatically occur here in real time.

Let's take a tour of this Task Board, starting with the functions at the top of your screen.


You can refresh the screen here.

You can create a new Task. If you delegate this task to an employee, it will show up on their personal Task Board. More on this later.
You can create a new list for this Task Board.
Also, you can create a new Task Board.

Under Boards, you can navigate to other Task Boards that you have permissions for.

This consists of all the lists within the current Task Board. By checking or unchecking these lists, you can show or hide them.

You can zoon in or out.

You can filter by Task Name, Priority, Assigned Employee, Notes, and Links.
You can also clear the filter here.
You will see this image below the functions at the top of your screen. This is the name of your Task Board. The image represents the creator of the Task Board. By clicking on it, you can make some edits to the Task Board.


Under the Details Tab, you can change the name. You can also hide it. You can also change the color of the Task Board, and change the creator of the Task Board.

Under the Notes Tab, you can add notes.

Under the Permissions Tab, you can grant editing and/or viewing permissions to your employees for this specific Task Board.
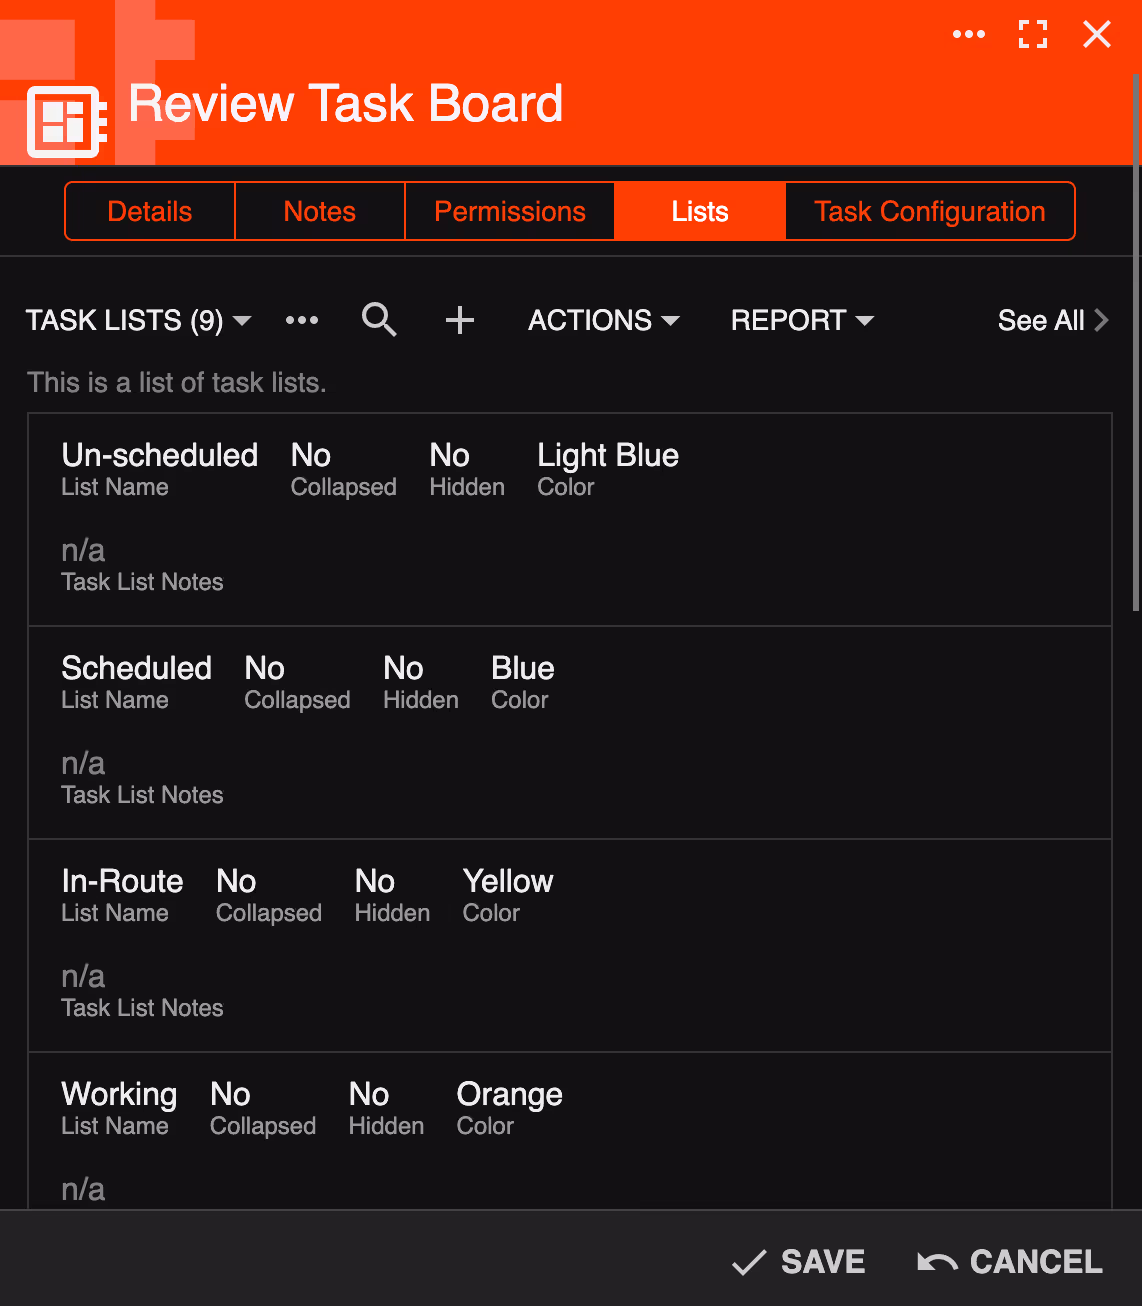
Under the Lists Tab, you can edit each Task Board list by clicking on them.

Under the Task Configuration tab, you can choose to show or hide some elements on each task.
In this example, your lists for your Work Orders Task Board reflects the pipeline of your Work Orders from the beginning to the end. Let's learn how to edit each individual list.


The number (36) represents how many tasks are in each list.

You can change the order of your lists by clicking and dragging.

You can collapse a list by clicking on the arrow.

By clicking on the three dots you will have some options.
We will start with editing the list, and then we will create a new task for the list.

By selecting "Edit List", this window will appear.
Under the Details tab you can change the name of the list. You can have the list collapsed or hidden by default. You can change the color of the list, and change the name of the Task Board.
Under the Notes tab you can add notes.
Under the Tasks tab, you can view and edit tasks within the list.
Be sure to hit save.
As we just discussed, by clicking on the three dots in a list, you can add a new task to that specific list. In this case, the Un-Scheduled list.
Select "New Task" to get started.

By selecting "New Task", this window will appear.
Under the Details tab, we will create a task to "Get These Work Orders Scheduled."
Give the task a priority and a color. You can lock this task to this list. Give it a due date.

Under the Links Tab, you can add links to the task. In this case, we will add a link to our Work Order with an A/C Installation description.

You can add notes to the task.

Under the Checklist tab, you can add to-do items to the task.
Be sure to hit save when you are done.
This new Task will show up in your Un-Scheduled list.

You can move it up or down the list.
Also, you can manually move a task to another list.


You will see the name of the task, the priority, as well as the due date.
By clicking on A/C Installation, it will open up the record. You will also see the notes.
You will see the checklist items, as well as a completion bar. As these checklist items are completed, a check-mark will appear on them, and the completion bar will reflect that.
Also, you will see an image of the task creator.

By clicking on the three dots, you will have some options. By duplicating the task you can use it as a template to create similar tasks.
By default, the task is assigned to the creator. So, let's edit this task and assign it to an employee that you already gave permissions to view and edit this Task Board.

Click on edit at the bottom of the window. Assign the task to the desired employee. In this example, we will assign it to Renee.
You can review and edit the task as well.
Be sure to hit save.

Renee's image will show up on the task next to the creator.
Make sure that Renee has both her picture on her profile and her email address as well.

An email will be sent to Renee to alert her, and to provide her with details.
When Renee goes to the appropriate Task Board, and Task Board List, she will find the task. She can double-click on it to review and edit.

She can go to the Links tab and open up the record that needs attention.
In this case, it's for an A/C Installation.


Then she can go to the Checklist tab and check off the items as she completes them.

The Checklist items for the Task will be updated in real time.
Renee can also open the installation record from here, and check off items as well.
When Renee has checked off all of the items in the Checklist, she can drag the Task to the appropriate list, in this case, "Completed".
An email will be sent to the Task creator to notify them that the task has been completed.

You can also create tasks for Renee that will populate in her Personal Task Board. At the top of your screen, click on "New" and select "Task".


Give the Task a name and select an employee. Include a due date and add additional information as needed.

Add checklist items.
Be sure to hit save.

Renee will receive an email notification. She will go to "Boards" at the top of her screen and select "Personal".
From there, she can work on the task. When she completes the task, you will receive an email notification.
For this example, we will be creating a new Task Board for our Christmas Party. At the top of your screen, click on "New" and select "Board".


Select "Define my own custom Task Board".

Under the Details tab, give it a name and a color.

Under the Notes tab, add notes.

Under the Permissions tab, add employees that you want to view and/or edit this Task Board.
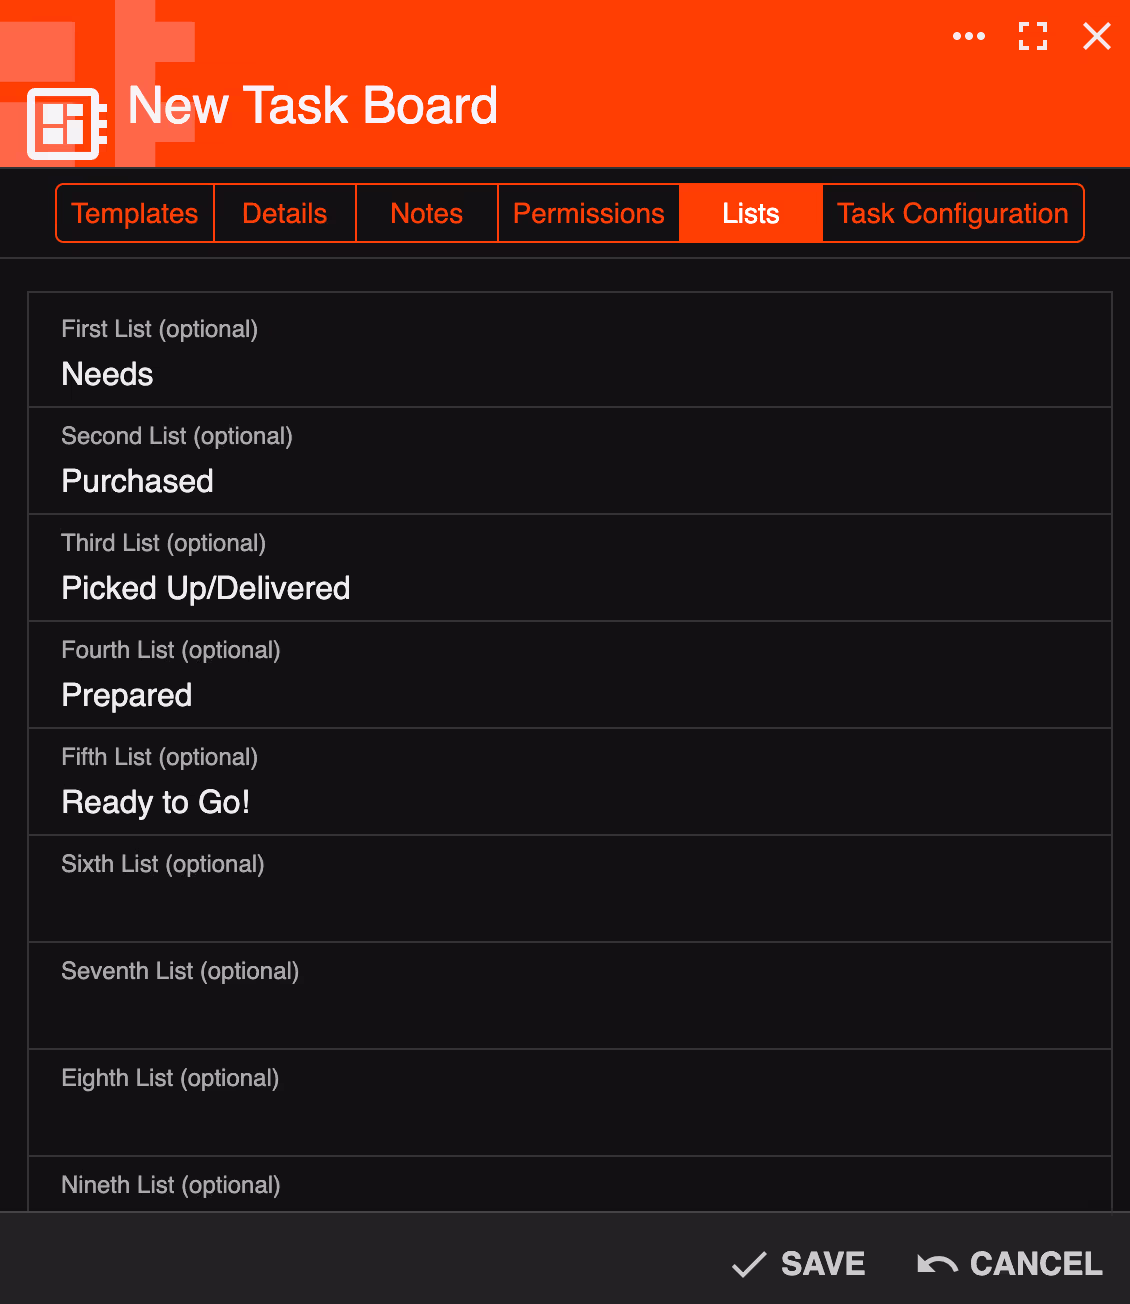
Under the Lists tab, add the lists that will represent the pipeline.
Be sure to hit save.
Your new Task Board will appear. Click on the Plus Symbol in the Needs list to add items to it.


Under the Details tab, give the task a name, priority, color, and due date.

Under the Checklist tab, add Checklist items.
Be sure to hit save.
Once you have created tasks for all of your needs, you can delegate these tasks to your employees by clicking on each task and selecting the desired employee.


Again, the Checklist items can be checked off directly on the task. Then they can be dragged to the next list. In this case, the Purchased list.
You will receive an email confirmation when this happens.
You can create tasks throughout Smart Service Cloud. For example, in the Work Orders Center, you can select a Work Order. Then click on "New Follow Up Task" on the left of your screen. From there you can create a task and assign it to an employee with checklist items. It will show up in their Personal Task Board.

Also throughout Smart Service Cloud you can create Batch Tasks. For example, in the Work Orders Center, you can select multiple Work Orders. Then click on "Batch Create" on the left of your screen. Then select "Tasks". From there you can create a task and assign it to an employee with checklist items. It will show up in thier Personal Task Board.
