Have a question? Enter a search term. Or give us a call at 1-888-518-0818
A Price Book is a great way to provide your customer with a visual when making new sales. With this feature, you can browse the stock you use from your vendors. Price books are available on both quotes and work orders, making it not only a useful sales tool but also a great visual guide to what your vendors have to offer.
Although you will use Price Books on quotes and work orders, you will need to set up the price books you want to use. Go to the Administration Center and select "Price Book Configuration".
Not all user profiles will have access to the administration center, so if you don’t see this section, speak with your office manager.
Lastly, we recommend that you reach out to your vendor or access their website as we’ll need that information and the pictures of the items to create these price books.


To create a new Price Book, click on the hamburger menu at the top right and choose the “New Price Book” option.
If you already have price books set up, you can click the . . . to make edits.
When you create a new Price Book, you can enter the company name, a short description of what they sell, and an image URL for their logo.
This information is how the vendor’s information will be presented when looking at the price book later.
For the image URL, we recommend just grabbing the URL from a quick Google search for that company’s logo. For the above example, a regular .jpg from GE Appliance’s Twitter account was used.


Click on the … next to your new price book to make a “branch” in the book. Since the price book works like a flowchart, this “branch” is a category of items sold by this vendor.
For the case of GE Appliances in our example, a branch for “ranges” has been created whereas refrigerators would be in their own branch.
Now that the “ranges” branch exists, branches within that branch can also be created using the same method. In this case that would be necessary as this vendor offers gas, electric, and induction ranges.
You can continue adding branches to your vendor or you can start creating some items that the vendor sells.
To create the item(s), go to the branch the item belongs to and click the … then select “New Item”. There are some other options there but we’ll return to those in a moment.


You can put as much or as little information for this item in the “New Item” window. On the left, we have a completely filled-out item record for a range offered by this vendor.
When you add this item to the price book, you will also link it to the “Item” in your products and services list, which controls what information will be shown on the quote/work order when you sell the item.
Each field available in this window is listed below.

Keep adding items to your price book until you have everything fleshed out.
Remember, you can return to this screen and make further modifications or create new price books at any time!
Once the Price Book is set up, you can access it from any quote or work order in Smart Service Cloud. This is a great way to help your customer visualize their options as well as provide a “good, better, best” style approach to your upsells. The image below shows how you can display your price book to a customer and choose an item to sell to them.

When you use the Price Book on a quote or work order, the Price Book will open in a separate tab in your browser. Navigate through the options with your customer and click the “Add Item” button when they’ve made their selection. Afterward, you can close the price order tab and return to your work order.
Everything discussed so far is the minimum setup for creating a price book, but they can be more expansive and much more helpful for your team with the additional options we have available below.

In the example above, we sold the customer a new gas range. But of course, we can’t just drop that range off at the customer’s house and walk away! This is where item groups come in. Using this feature, you can bundle existing products and services together.
This helps because when you add the main item (in this case, a range) the fittings, gaskets, and labor can be grouped and added to the quote or work order together.
If you’re ready to get started on creating new item groups, click the … in the branch where the group belongs.
On a computer, you can click and drag to move around the price book, or use the scroll wheel on your mouse to zoom in/out. You can do this on your mobile device as well by dragging your finger around the screen to move or pinch-zoom in/out.

As shown, you can control how the price books are displayed. By clicking the up arrows at the bottom right, you can choose which shape and flow the price book should use.
You can also use the buttons above the up arrow to zoom in/out or expand and collapse all of the price books.
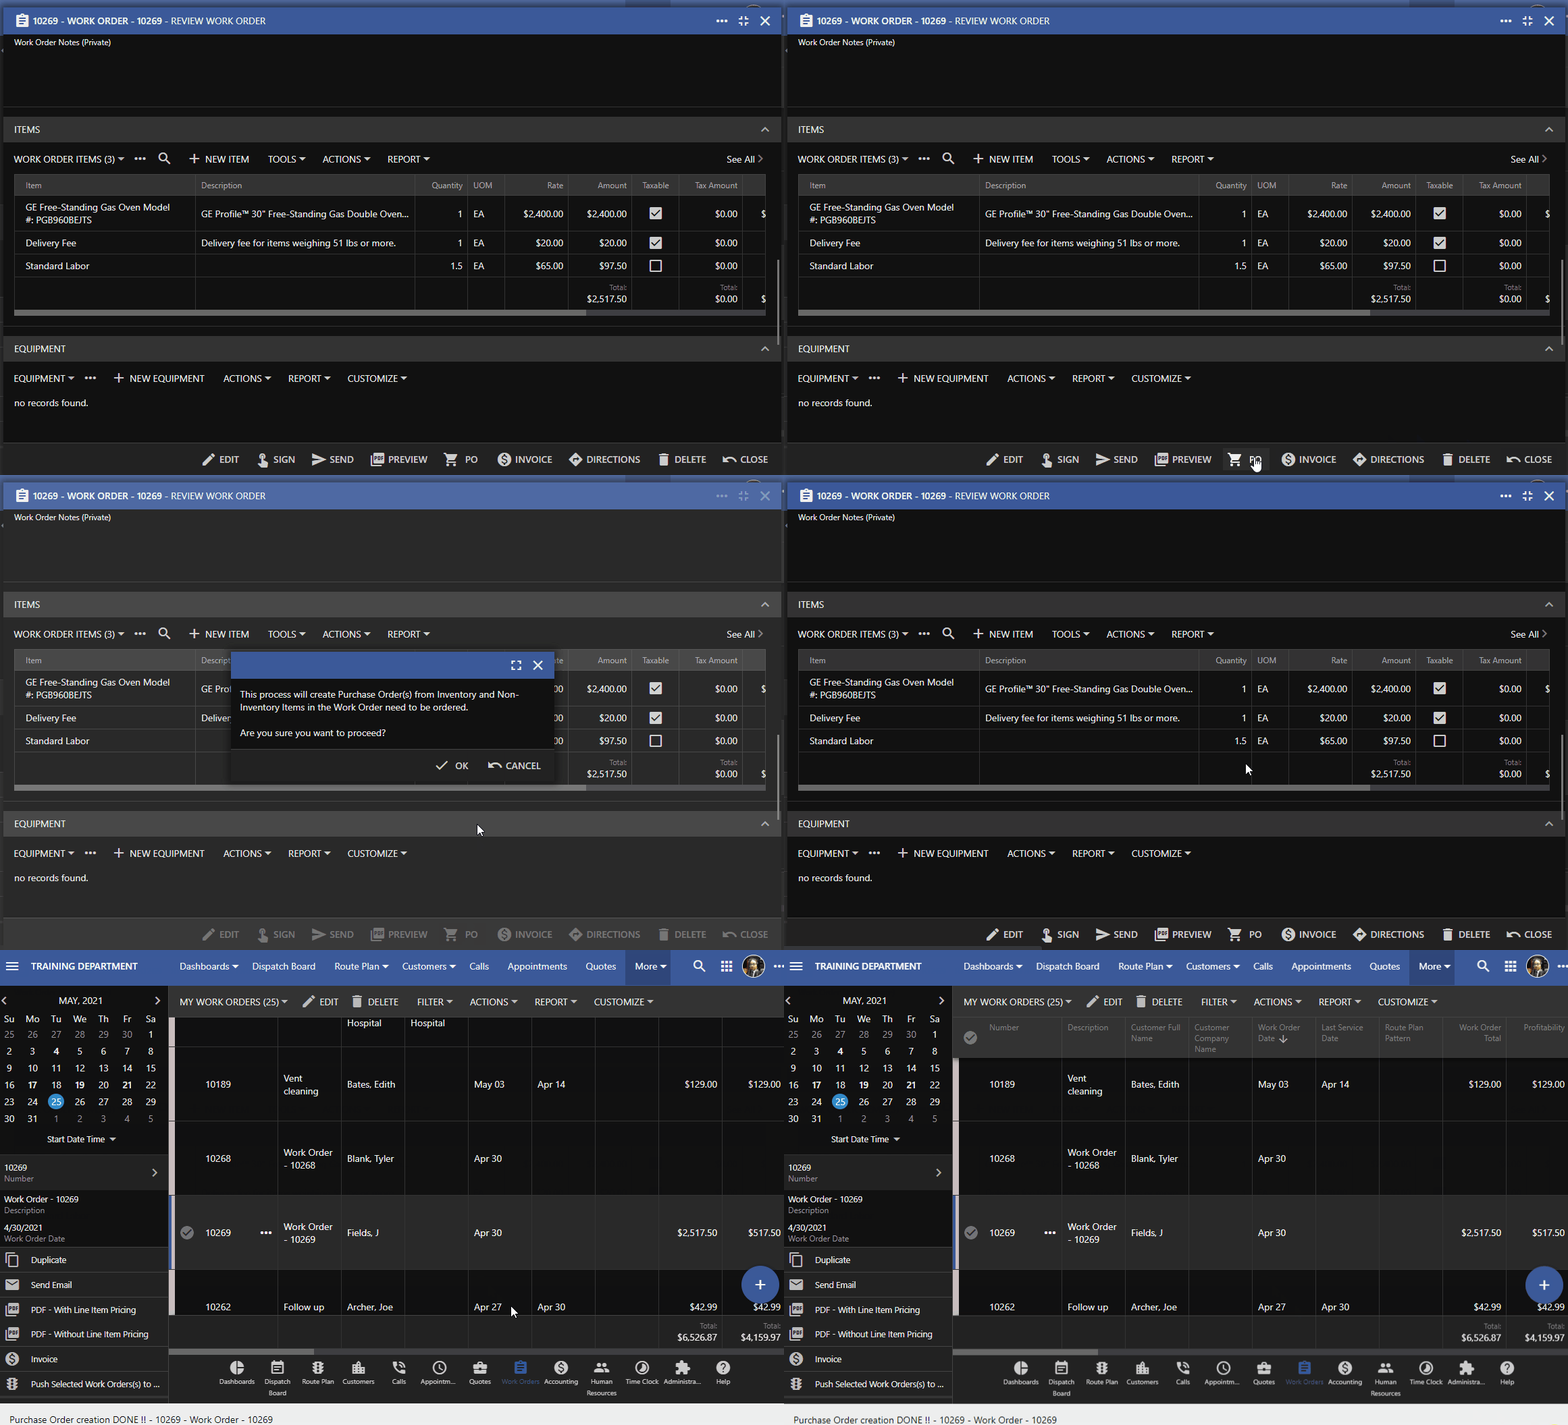
Great! You’ve added your items/groups of items to the work order and you’re ready to go! Except, you might now need to order some of these items for the customer. Instead of adding them again to a purchase order, click the “PO” button at the bottom of your work order for a quick and easy PO for inventory and non-inventory items.
