Have a question? Enter a search term. Or give us a call at 1-888-518-0818
We consider any service that requires you to inspect the issue on day one and return with parts to resolve the issue on day two a “Diagnose & Repair” service. This could be expanded to jobs where the work area gets prepped on day one and the work happens on another day, like power washing and painting.

You could start this work order from scratch (or alternatively, a quote if that’s better for the situation) by clicking and dragging over a time slot on the dispatch board. If you’ve set up Quick Entries previously, you could start with one of those instead.
Whether you chose to start with a quote or work order, your part of the process is largely the same from the office side. When you start your quote or work order, you should select a customer and enter a job description on the appointment screen. We’ve included an example of what you could add to each box in the picture below.

Once you’ve added this information to your appointment, click save at the bottom. This will take you back to the calendar where you can open the appointment by clicking on it.
You don’t actually need to do anything further with this work order at this point. Our next few steps will cover how to add items and other things to the work order, but your field tech can also do that from their side of things. If you choose not to add further information now, it will still be automatically sent to the field tech.

Inside the work order, you could add items, notes, equipment, or anything else that the field tech can do. We see customers doing this when you have an initial fee for a service call like this or something that you know you’ll charge for the visit.

The sections above have a “New…” button in them where you can add new items, equipment, attachments, or purchase orders. For the notes section, you can click the “Edit” button at the bottom of this screen. This is also how you can change other information on the work order.
When you’re done click the “save” or “close” button at the bottom. This work order will automatically be dispatched to your technician.
In certain situations, upon completing a diagnosis, you may realize the necessity of a return visit, either due to the need to wait for a required part or to assemble a crew, for example. The easiest way to schedule the return visit is to move the existing appointment into the waiting list.

To move an appointment to the waiting list, you need to be on the Dispatch Board. Right-click on the appointment you wish to move to the waiting list, hover over “Status”, and click the “Waiting List” option at the top. Doing this will remove the job from the Dispatch Board and place it on the waiting list at the bottom of the screen.

When you receive the appropriate parts later, or you have the ability to complete the job, all you have to do is drag and drop the appointment on the waiting list to the calendar. This can be done by clicking and dragging the job to the desired time slot.
For each date of service, your field tech will mark the work order as complete. In doing so, they’re marking the specific date in question as complete, not the job as a whole. With that in mind, the invoicing process is quite similar to the standard service call process.
Regardless of how many dates are on this service, Smart Service Cloud will create an invoice for each date of service individually. When day one is marked as “invoiced”, day two will be treated as its own extension of this service and thus need to be completed by the field and eventually invoiced.
For this guide, we’re assuming that your field tech marks a work order as complete and doesn’t collect payment on site. If your field tech does collect payments, you can skip this section and instead check out our article on collecting payments and sending info to QuickBooks Online.
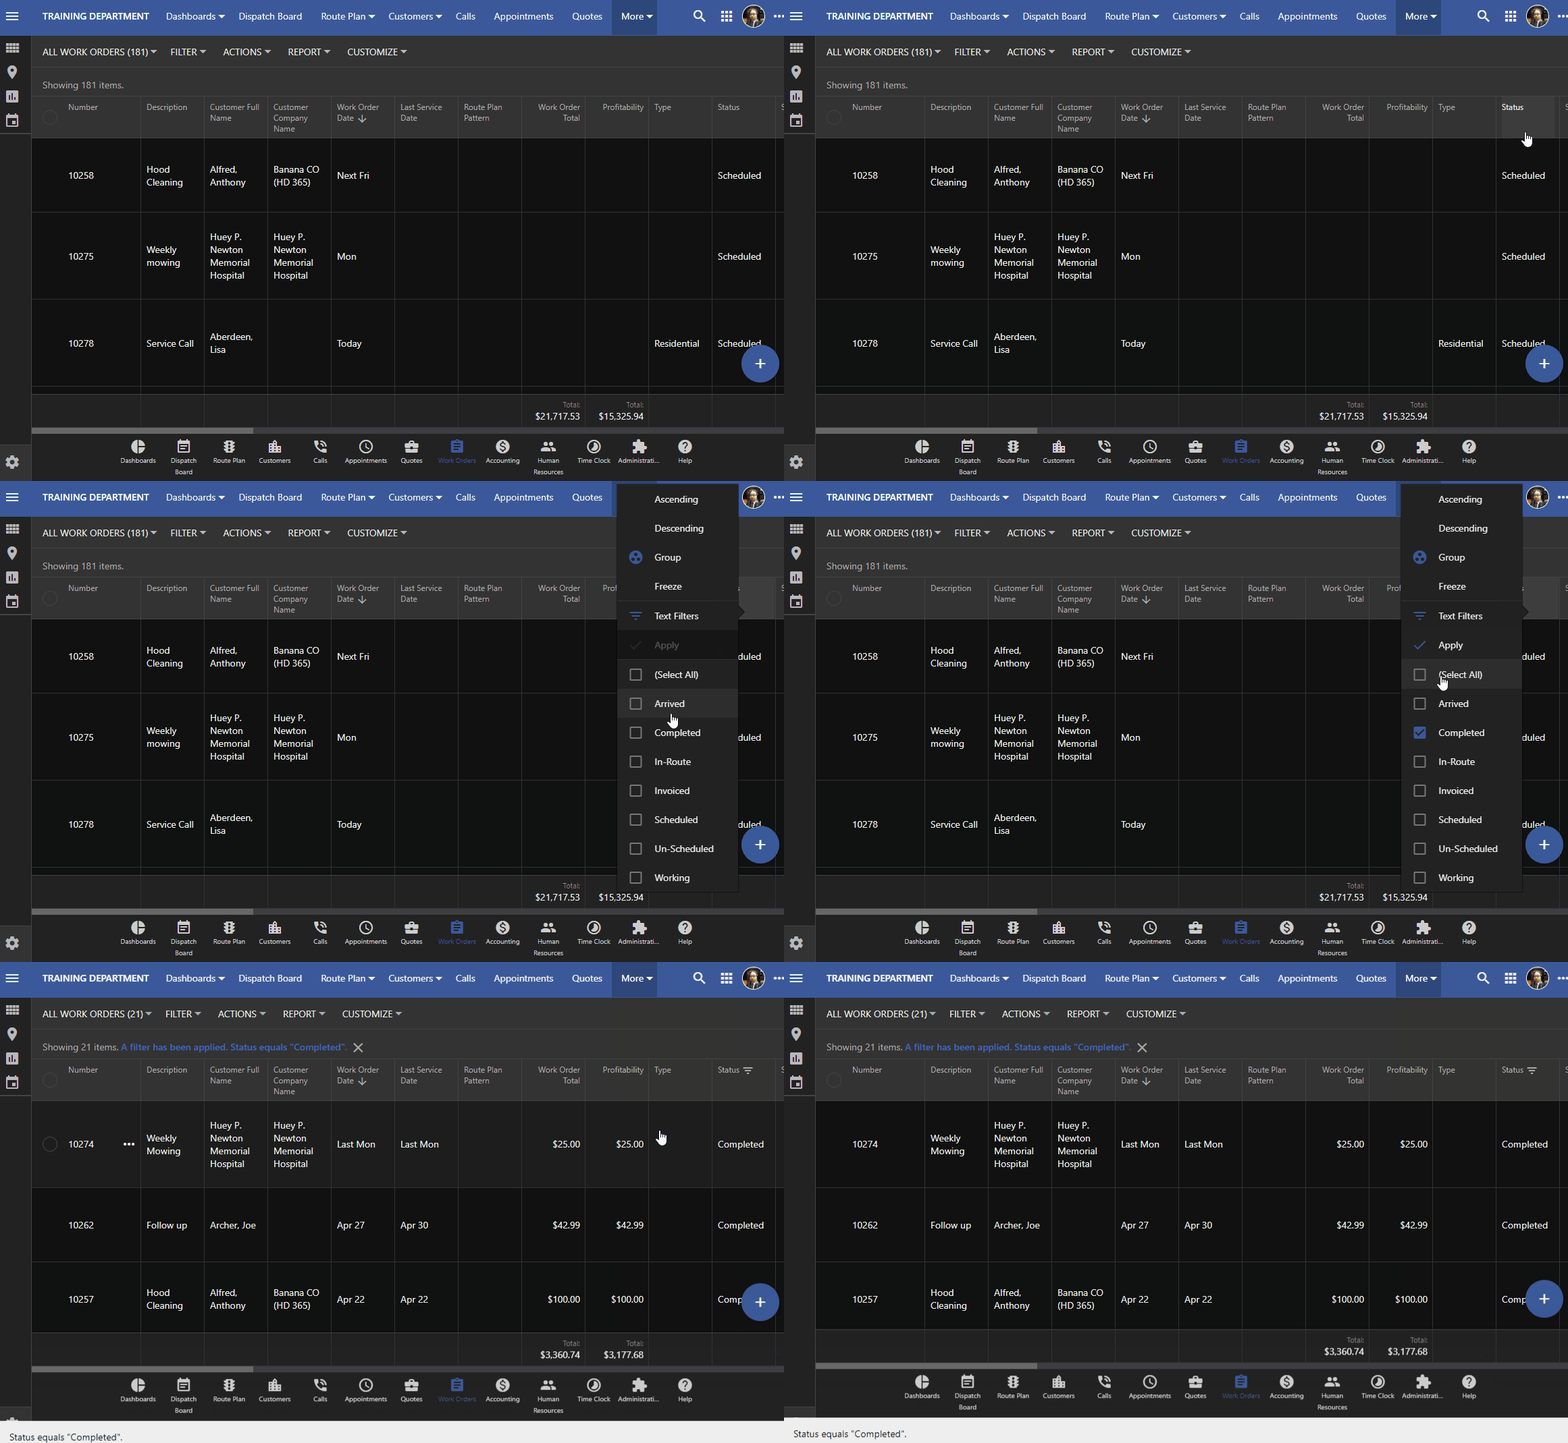
Click on the “Work Order” center at the top of the screen and filter your list by right-clicking the “Status” column header and filtering to “Completed” status. Once work orders are invoiced they receive the “Invoiced” status, so this list should only show items completed and not yet invoiced.

When you mark a date of a multi-day service like this as “Invoiced” the items on the recurring work order will transfer to the next work order. This means that if you’d prefer to invoice for all service dates at once when the job is complete. You can delete the resulting invoice from day one without losing information.